GET
The GET method retrieves data from the server.
You must Bring Your Own Device and have access to an IBM i.
While you can simply copy the code, it is recommended to follow along and type it out yourself to get a better understanding of the concepts.
REST (Representational State Transfer) is a way to design networked applications. It uses HTTP requests to perform operations like Create, Read, Update, and Delete (CRUD) on resources identified by URLs.
Key principles of REST:
In summary, RESTful APIs provide a standardized way for systems to communicate over HTTP using a set of well-defined operations and principles.
GET
The GET method retrieves data from the server.
PUT
The PUT method replaces all current representations of the target resource with the request payload.
PATCH
The PATCH method is used to apply partial modifications to a resource.
POST
The POST method is used update an existing resource or create a new resource.
DELETE
The DELETE method deletes the specified resource.
HEAD/OPTIONS/TRACE/CONNECT
Less commonly used methods for various purposes like checking the server status, options available, tracing the request, and establishing a tunnel.
200 OK
The request has succeeded.
201 Created
The request has been fulfilled and has resulted in one or more new resources being created.
400 Bad Request
The server cannot or will not process the request due to an apparent client close.
401 Unauthorized
Similar to 403 Forbidden, but specifically for use when authentication is required and has failed or has not yet been provided.
404 Not Found
The requested resource could not be found but may be available in the future.
500 Internal Server Error
A generic error message, given when an unexpected condition was encountered and no more specific message is suitable.
Installing Python is straightforward. You can download the latest version from the official Python website.
When you first install Python, make sure to check the box that says [✓] Add Python to PATH!
Step #1
Create a new folder for your project. This can be a folder anywhere on your computer.
Step #2
Open Visual Studio Code and select FILE and “Open Folder” to open your project folder.
Step #3
Open the terminal (Ctrl + ` in VS Code).
Step #4
Create a new virtual environment:
python3 -m venv --system-site-packages venvStep #5
Activate your virtual environment:
venv\Scripts\activatesource venv/bin/activate. venv/bin/activate
pip to install Flaskpip3 install flask
hello.pyfrom flask import Flask
app = Flask(__name__)
@app.route('/')def home(): return 'Hello, World!'
# ^^ Add New Routes Above ^^if __name__ == '__main__': app.run(debug=True, port=5000)We start by importing the Flask module and creating a new instance of the Flask class. We then define a route for the root URL / that returns the string “Hello, World!“.
python3 hello.py
Navigate to http://127.0.0.1:5000. You should see “Hello, World!“.
pip3 install mapepire-python
mapepire.ini updating SERVERNAME, USERNAME, PASSWORD[mapepire]SERVER=SERVERNAMEPORT=10500USER=USERNAMEPASSWORD=PASSWORDThe default port if you setup mapepire server on your IBM i is 8076.
db.pyCreating a new file db.py to handle the database connection will help keep your code organized and keep us from repeating the same code in multiple places.
import configparserfrom mapepire_python import connectfrom mapepire_python.data_types import DaemonServer
def get_db():    config = configparser.ConfigParser()    config.read('mapepire.ini')
    creds = DaemonServer(        host=config['mapepire']['SERVER'],        port=config['mapepire']['PORT'],        user=config['mapepire']['USER'],        password=config['mapepire']['PASSWORD'],        ignoreUnauthorized=True    )
    return connect(creds)
Create a new program host.py
Here’s an example of a simple API that returns a list of employees from the SAMPLE.EMPLOYEE table:
import osfrom flask import Flask, jsonify, requestfrom db import get_db
app = Flask(__name__)
@app.route('/employees', methods=['GET'])def get_employees():    with get_db() as conn:        with conn.execute("""            select                empno as "id",                firstnme as "first",                lastname as "last",                job as "job",                workdept as "workdept",                salary as "salary"            from sample.employee        """) as cursor:            rows = cursor.fetchall()
            return rows['data']
# ^^ Add New Routes Above ^^if __name__ == '__main__':    app.run(debug=True, port=5000)
{id}Add the following route to host.py to retrieve a specific employee by their ID:
@app.route('/employees/<id>', methods=['GET'])def get_employee(id):    with get_db() as conn:        with conn.execute("""            select                empno as "id",                firstnme as "first",                lastname as "last",                job as "job",                workdept as "workdept",                salary as "salary"            from sample.employee            where empno = ?        """, (id,)) as cursor:            employee = cursor.fetchone()
            if employee['data']:                return employee['data']            else:                return jsonify({"error": "Employee not found"}), 404
Add the following route to host.py to retrieve all departments:
@app.route('/departments', methods=['GET'])def get_departments():    with get_db() as conn:        with conn.execute("""            select                deptno as "id",                deptname as "name",                location as "location",                mgrno as "manager"            from sample.department        """) as cursor:            rows = cursor.fetchall()
            return rows['data']
{id}Add the following route to host.py to retrieve a specific department by its ID:
@app.route('/departments/<id>', methods=['GET'])def get_department(id):    with get_db() as conn:        with conn.execute("""            select                deptno as "id",                deptname as "name",                location as "location",                mgrno as "manager"            from sample.department            where deptno = ?        """, (id,)) as cursor:            department = cursor.fetchone()
            if department['data']:                return department['data']            else:                return jsonify({"error": "Department not found"}), 404
Before we move onto other REST methods, let’s cover how to test your API with tools that are available to you.
Use the extension in VS Code to test your API endpoints.
New Request andhttp://127.0.0.1:5000/employees)Send Request to see the response.
How to use Thunder Client:
Fullscreen the video for a better view.
{id}Add the following route to host.py to update the manager for a specific department by its ID using a PATCH request:
@app.route('/departments/<id>', methods=['PATCH'])def update_department(id):    payload = request.get_json()    with get_db() as conn:        with conn.execute("""            SELECT                deptno as "id",                deptname as "name",                location as "location",                mgrno as "manager"            FROM sample.department            WHERE deptno = ?        """, (id,)) as cursor:            department = cursor.fetchone()
            if department['data']:                conn.execute(                    """                    UPDATE sample.department                    SET deptname = ?, location = ?, mgrno = ?                    WHERE deptno = ?                    """,                    (payload['name'], payload['location'], payload['manager'], id)                )
updated_department = { "id": id, "name": payload['name'], "location": payload['location'], "manager": payload['manager'] } return jsonify(updated_department) else: return jsonify({"error": "Department not found"}), 404Select PATCH and enter http://127.0.0.1:5000/departments/A00 with the following JSON data in the Request Body:
{ "name": "New Department Name", "location": "New Location", "manager": "000020"}Then switch to GET to verify the changes.
To consume an API, you can use the popular requests library in Python. Install it using:
pip3 install requests
First, create a new file consume.py and add the following code to retrieve the list of employees:
import requests
# Get the list of employees from our host APIresponse = requests.get('http://127.0.0.1:5000/employees')if response.status_code == 200: # Check if the request was successful    employees = response.json() # Convert the response to JSON    print("Employees:", employees)else: # Error handling    print("Failed to retrieve employees:", response.status_code)    print(response.text)
This script sends a GET request to the /employees endpoint and prints the list of employees if the request is successful.
consume.pypython3 consume.py
Next, add code to consume.py to patch departments with data from the /departments endpoint:
# Send the GET request to retrieve all departmentsresponse = requests.get('http://127.0.0.1:5000/departments')if response.status_code == 200:    departments = response.json() # Convert the response to JSON
    for department in departments: # Loop through each department        department_id = department['id']
        # Update the department's location to "Costa Mesa"        updated_department = {            "name": department['name'],            "manager": department['manager'],            "location": "Costa Mesa"        }
        # Send the PATCH request to update the department's location passing in department_id and updated_department        patch_response = requests.patch(f'http://127.0.0.1:5000/departments/{department_id}', json=updated_department)        if patch_response.status_code == 200:            print(f"Department {department_id} location updated successfully.")        else:            print(f"Failed to update department {department_id}:", patch_response.status_code)            print(patch_response.text)else:    print("Failed to retrieve departments:", response.status_code)    print(response.text)
This script sends a PATCH request to the /departments endpoint with the new location data and prints the ID of the updated departments if the request is successful.
consume.py againhost.py script should be running. Call python3 consume.py to test the script.
The code should GET the list of Departments, PATCH the location to “Costa Mesa” and print that it updated departments.
Verify Location was updated by calling GET on the /departments endpoint.
python3 consume.pyYou’ve successfully set up a basic Flask application, created API endpoints and consumed those APIs all using Python.
This is for you!
Take a moment to reflect on what you’ve learned and how you can apply this knowledge to your own projects.
Finish the workshop early? Try these challenges!
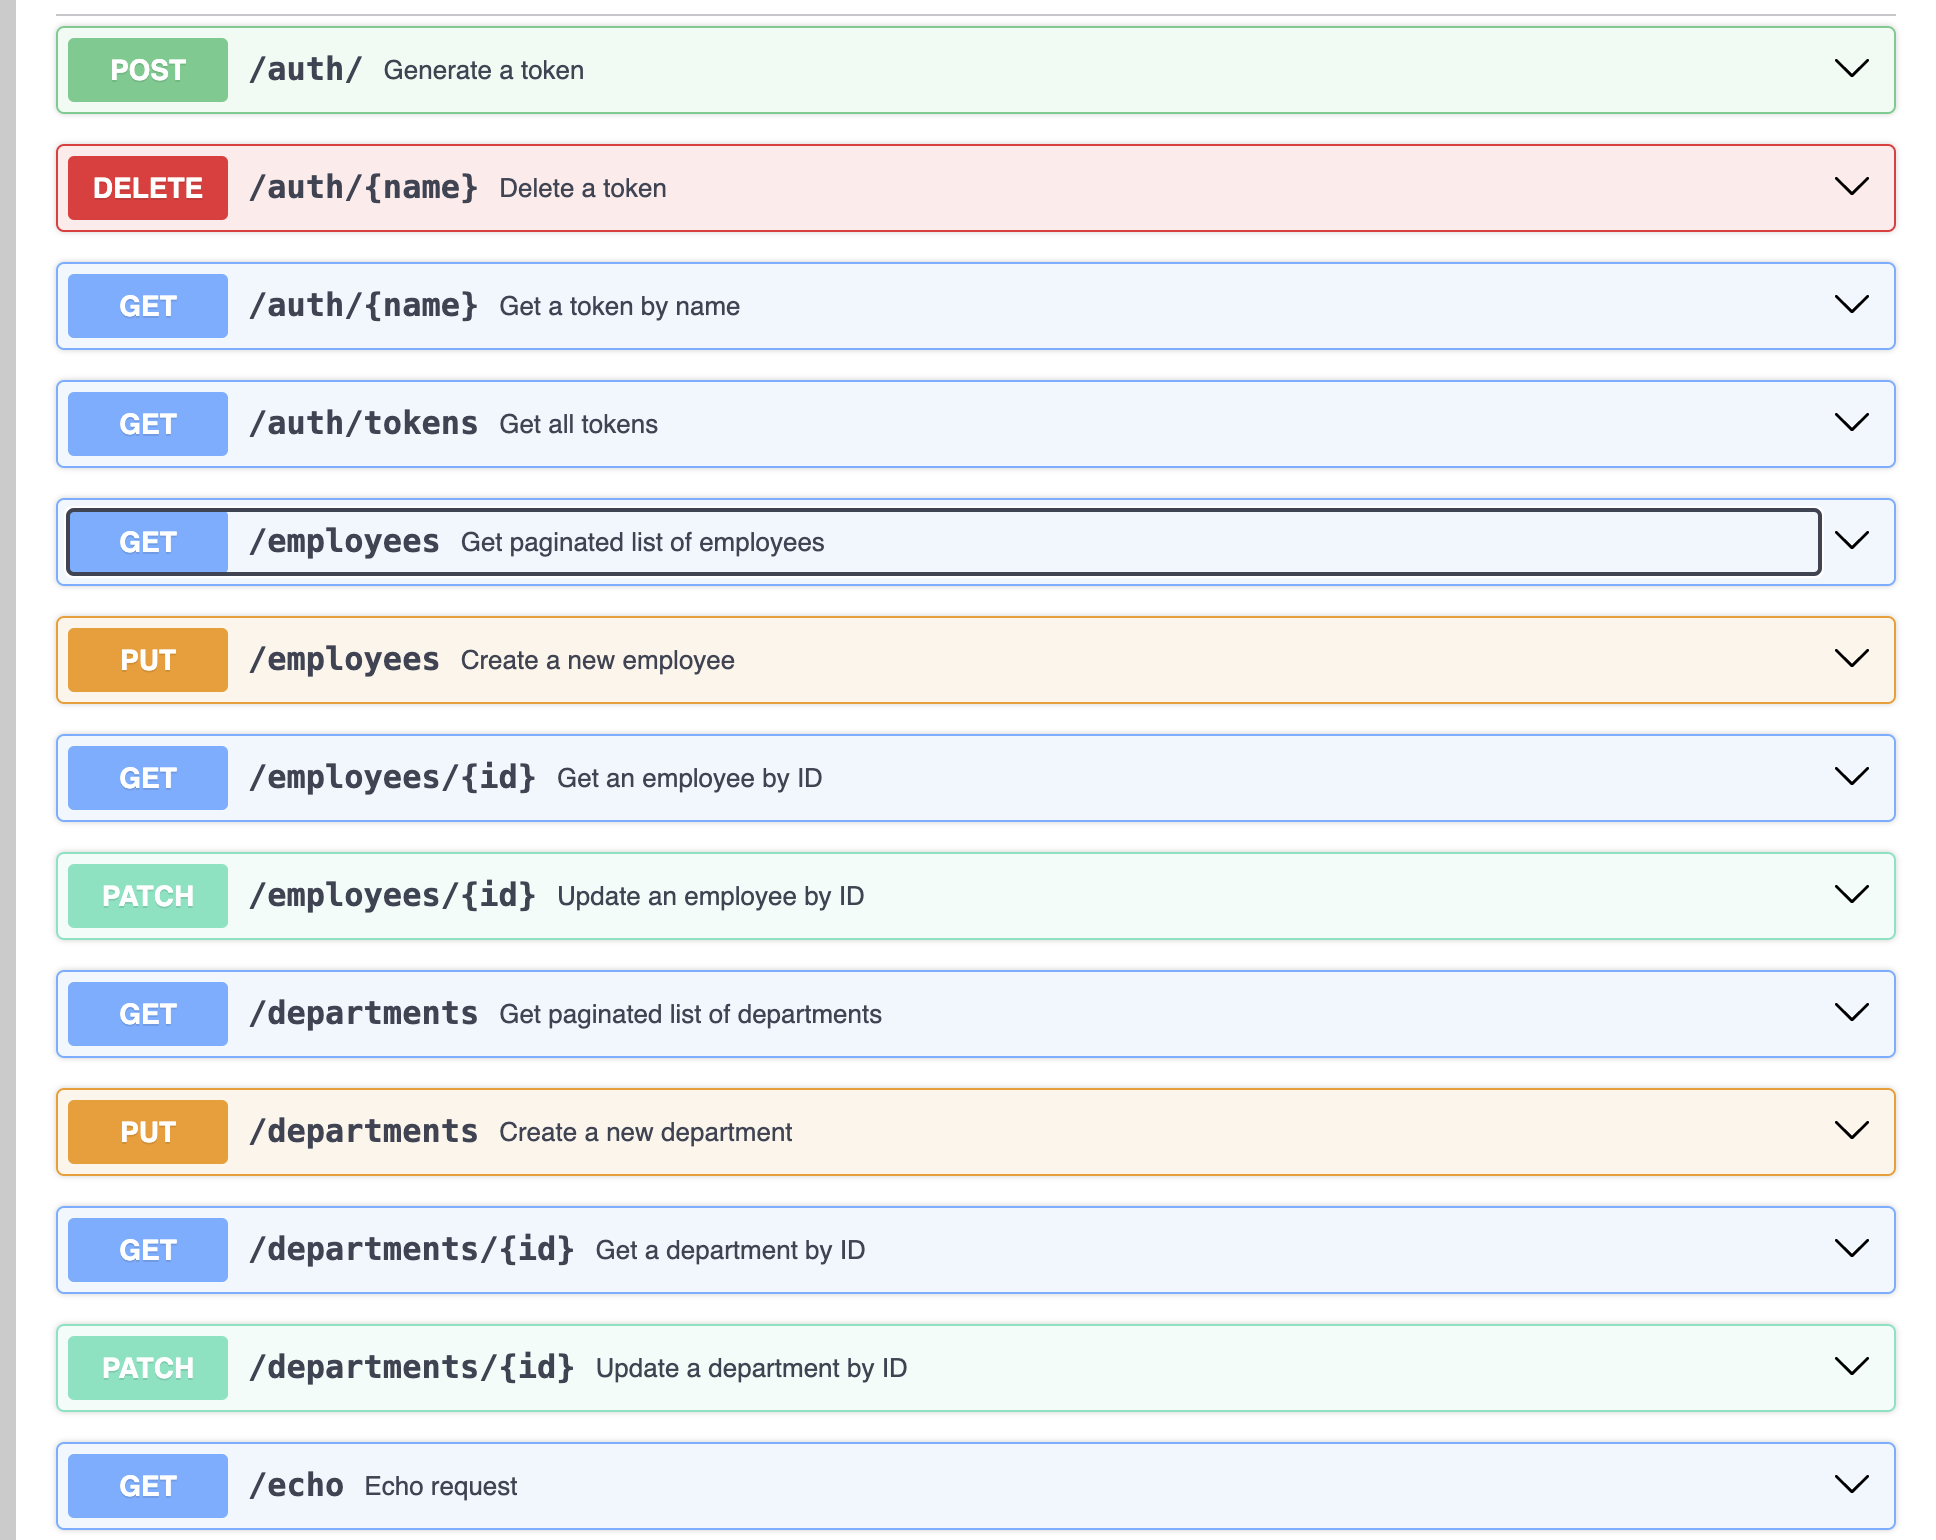
The API Playground is a hosted web-based API testing site I built that allows you to visualize both the sending and receiving of data.
Take a look at the API endpoints available in the API Playground and try to consume them using Python.
Swagger UI is a popular tool for visualizing APIs. It provides a user-friendly interface to interact with APIs and understand their endpoints and data structures.
If an API has an OpenAPI formatted yml or json file, you can use Swagger UI to visualize it.
Many APIs require authentication to access their endpoints. There are several methods for authenticating requests to APIs.
Authorization header.Authorization header. The token is usually a JWT (JSON Web Token).
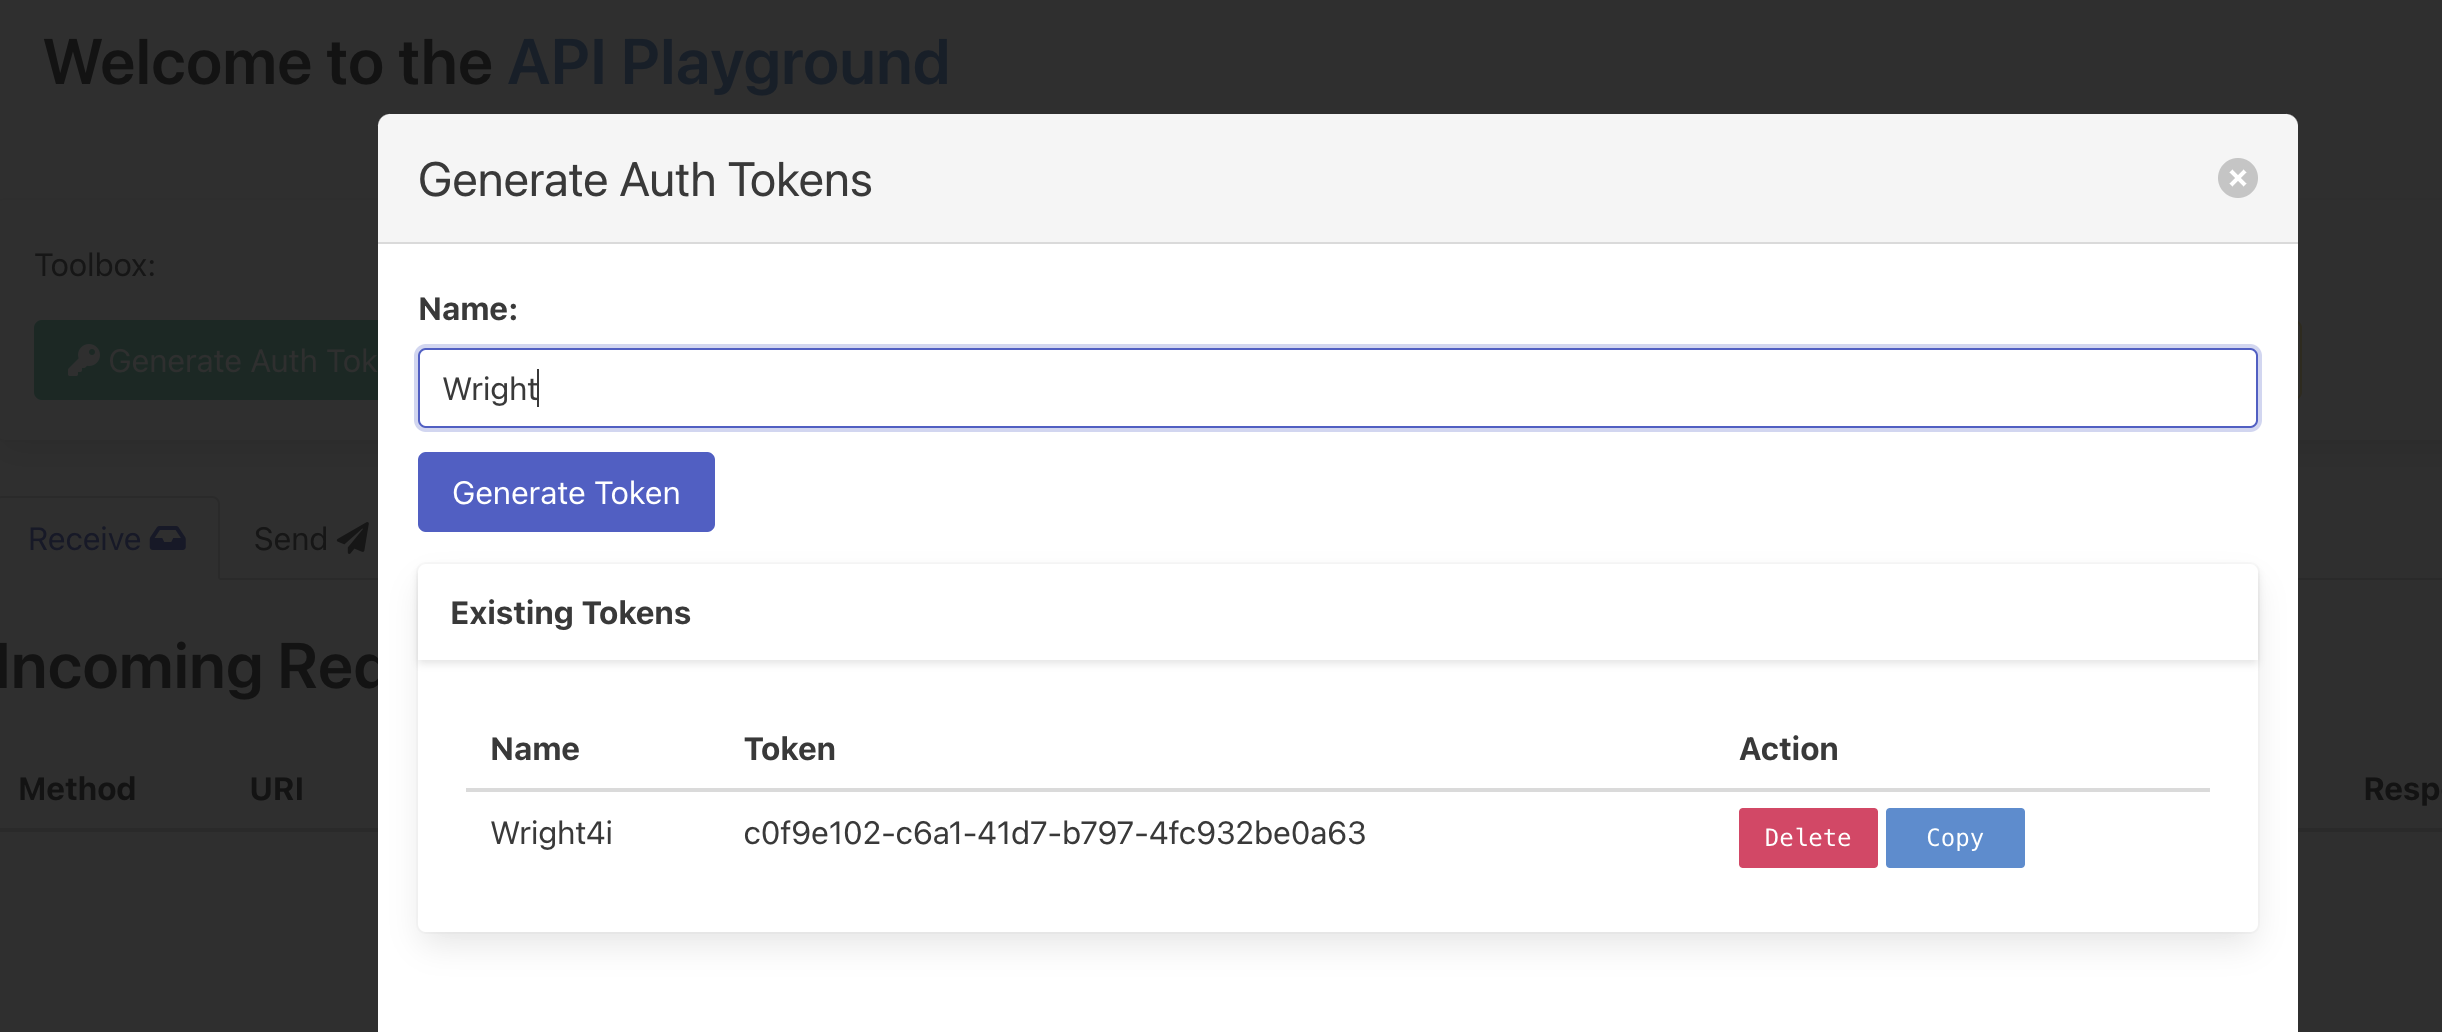
To test Auth Tokens add the Authorization header to your requests.
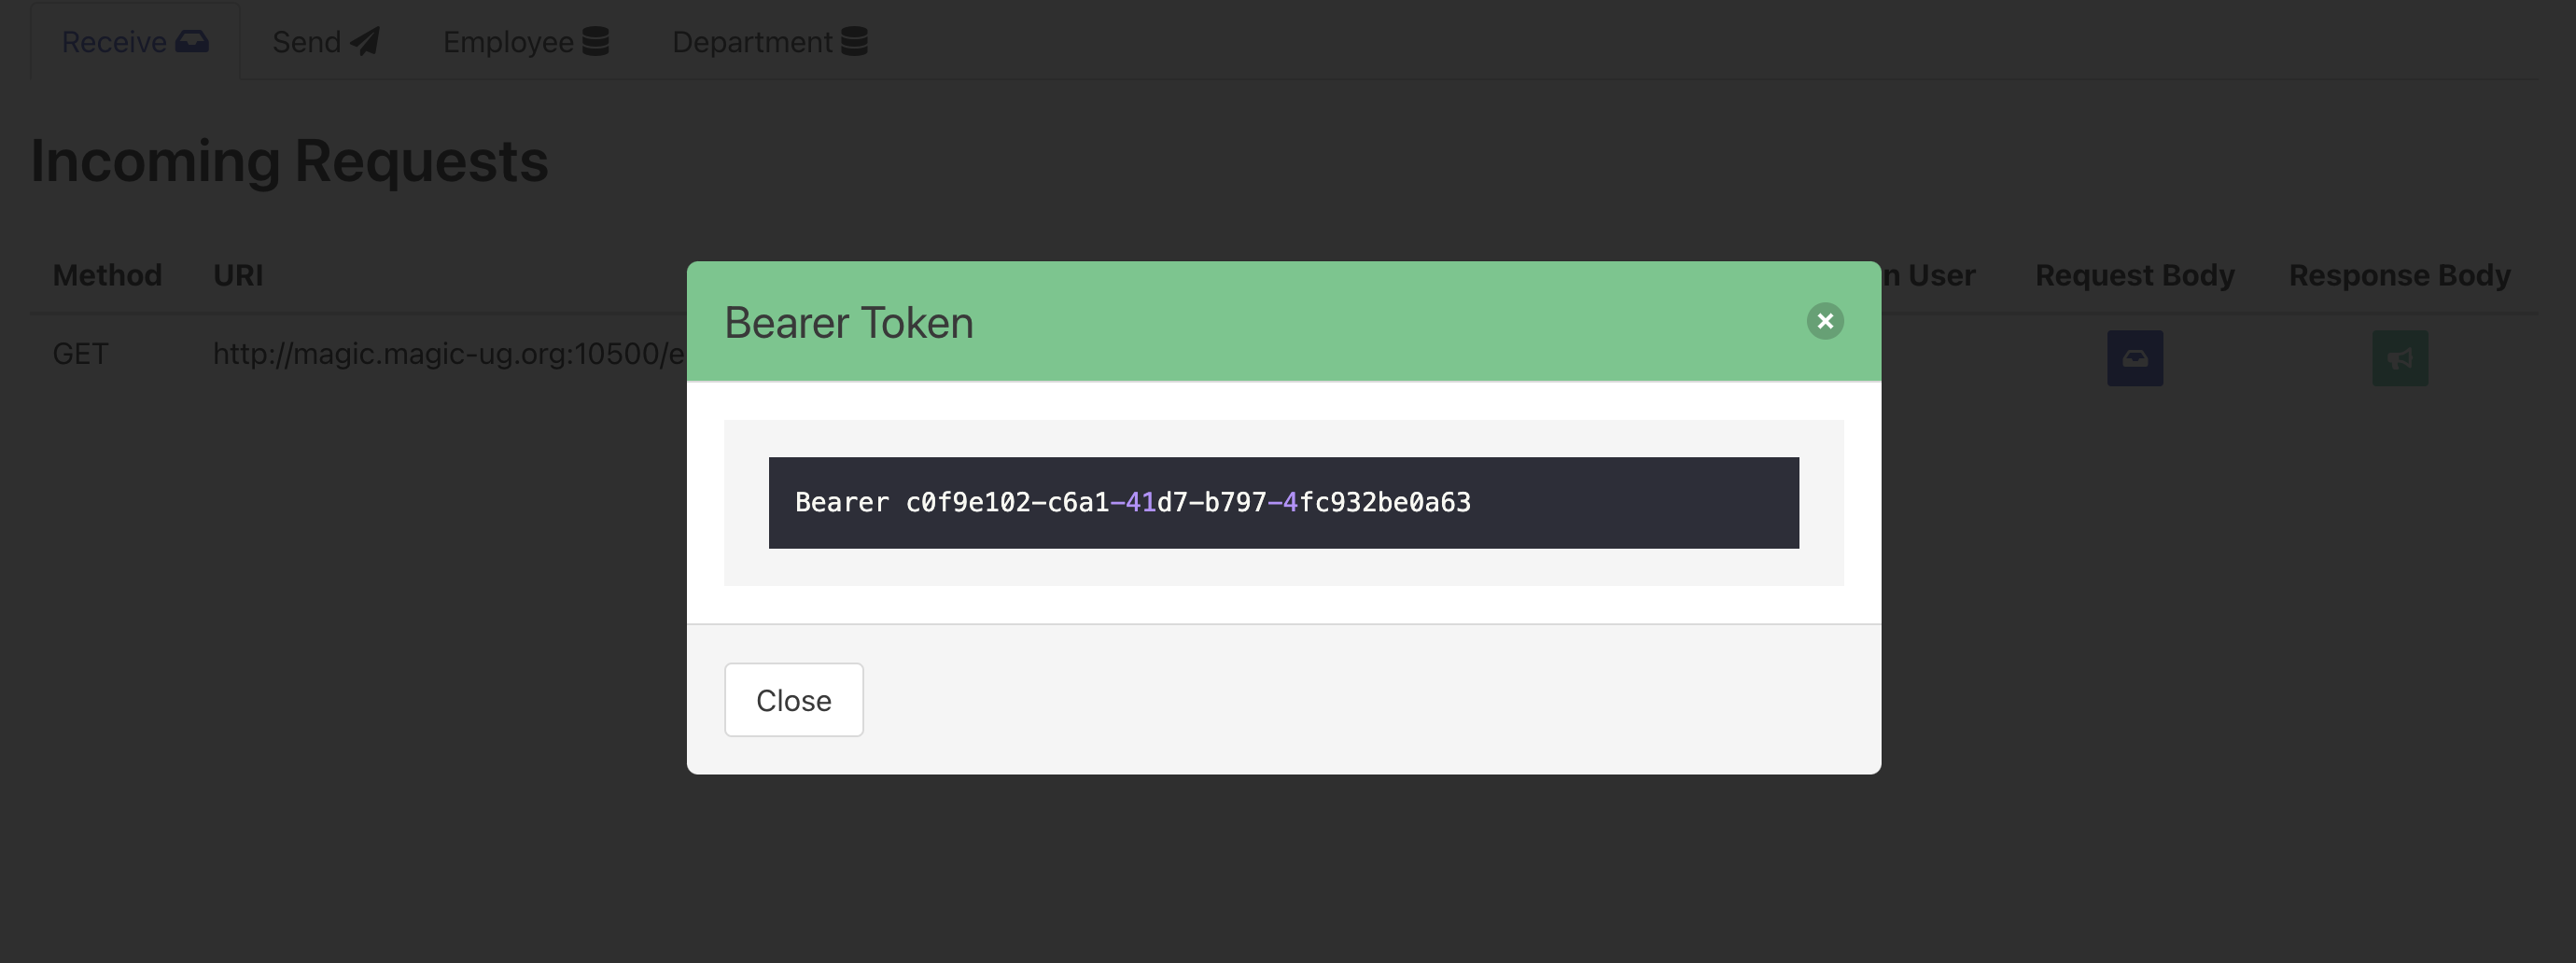
If your client supports it, there might be a dedicated tab for Auth. Refer to the screenshot for using a bearer token in Thunder Client.
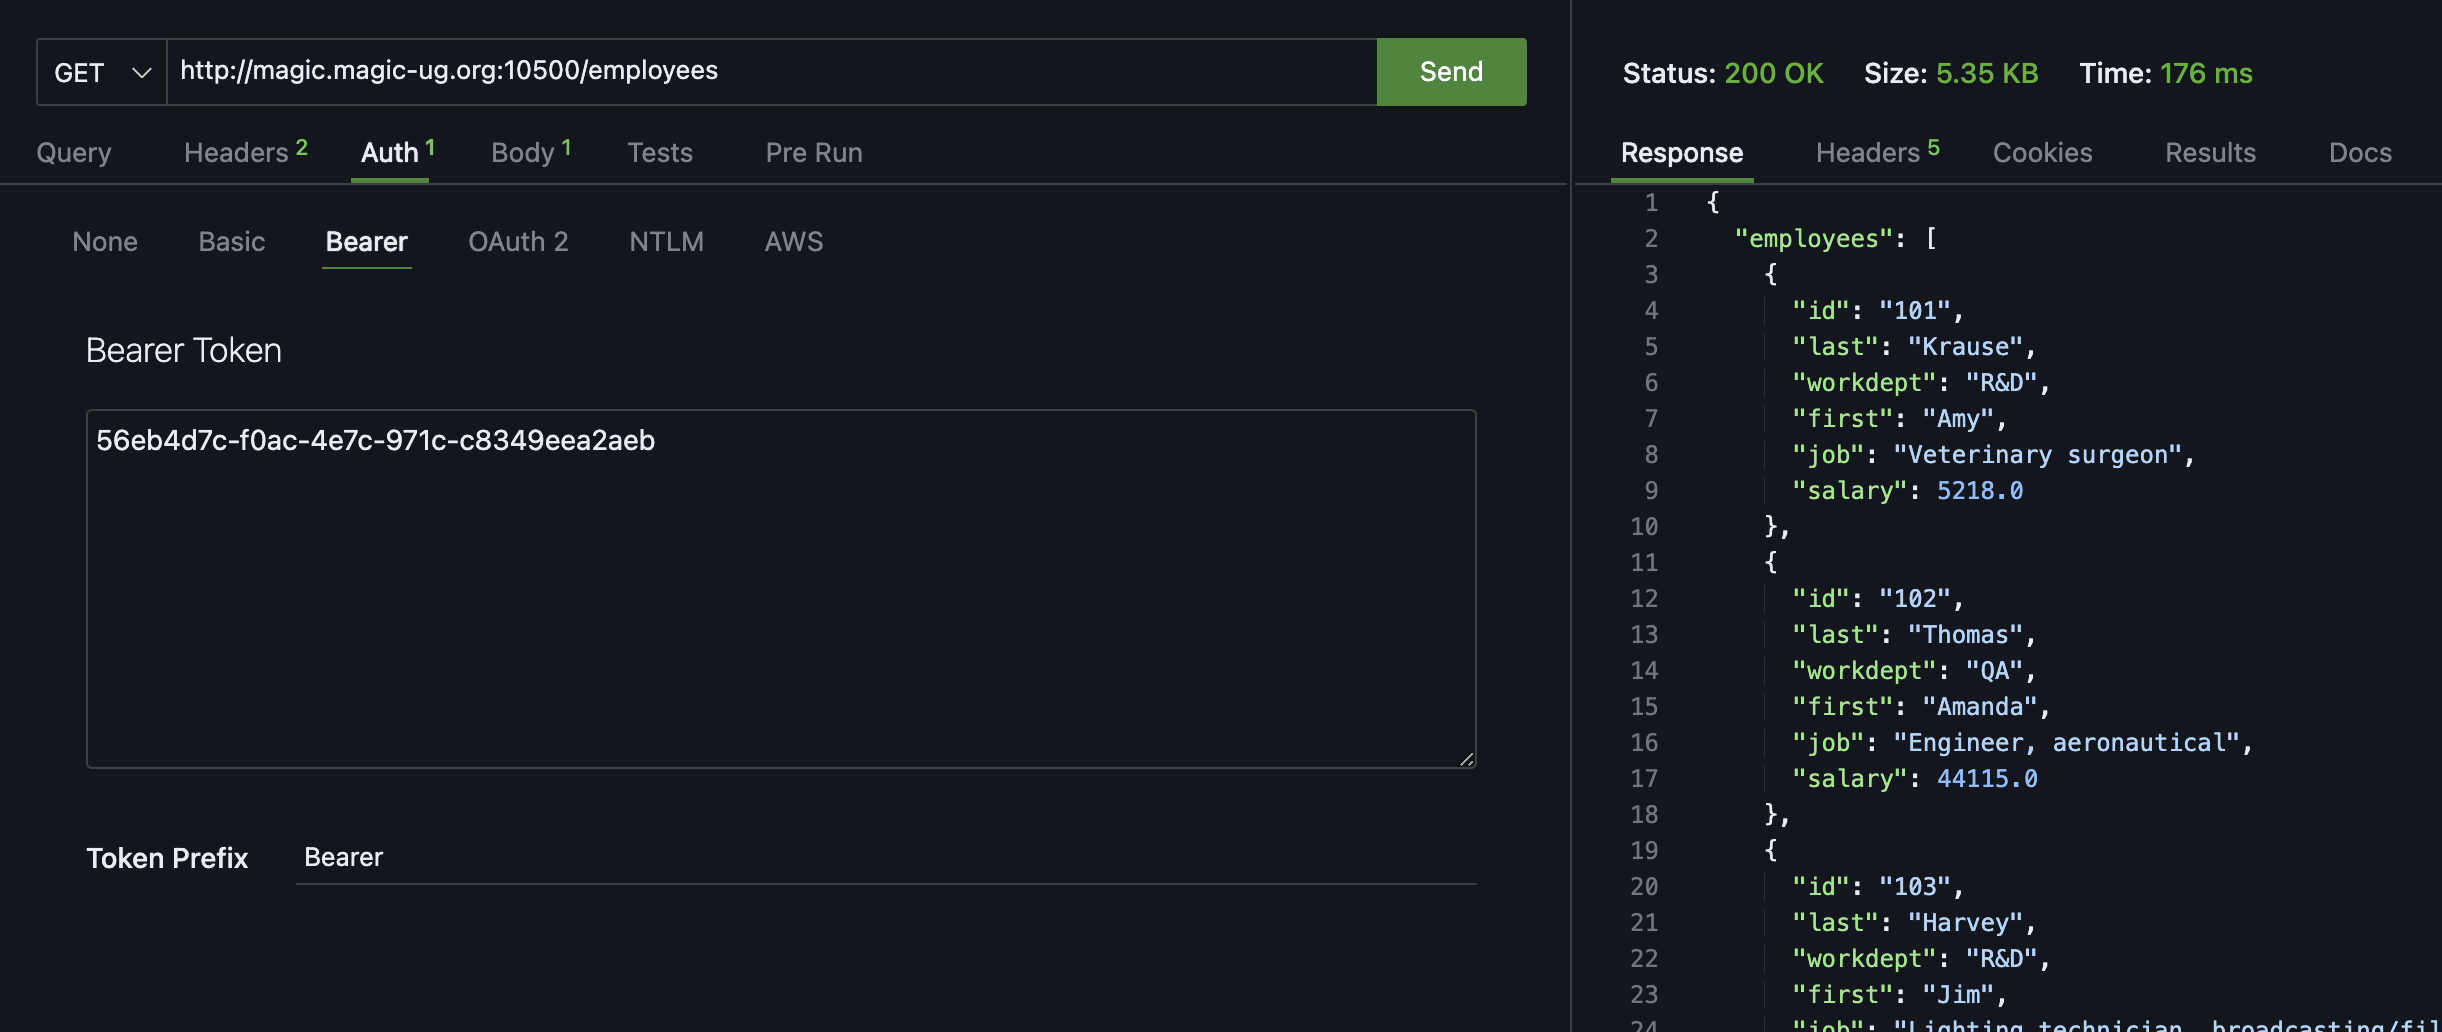
To send a bearer token in your GET request to /employees, you need to include the Authorization header with the token when calling requests.
import requests
# Define the bearer tokentoken = 'your_token_here'
# Set the headers with the Authorization tokenheaders = { 'Authorization': f'Bearer {token}' }
# Get the list of employeesresponse = requests.get('http://127.0.0.1:5000/employees', headers=headers)if response.status_code == 200:    employees = response.json()    print("Employees:", employees)else:    print("Failed to retrieve employees:", response.status_code)
Replace ‘your_token_here’ with your actual bearer token. This script sends a GET request to the /employees endpoint with the bearer token included in the Authorization header.
/employees or /departments with the Auth Token and watch it populate on the Receive Tab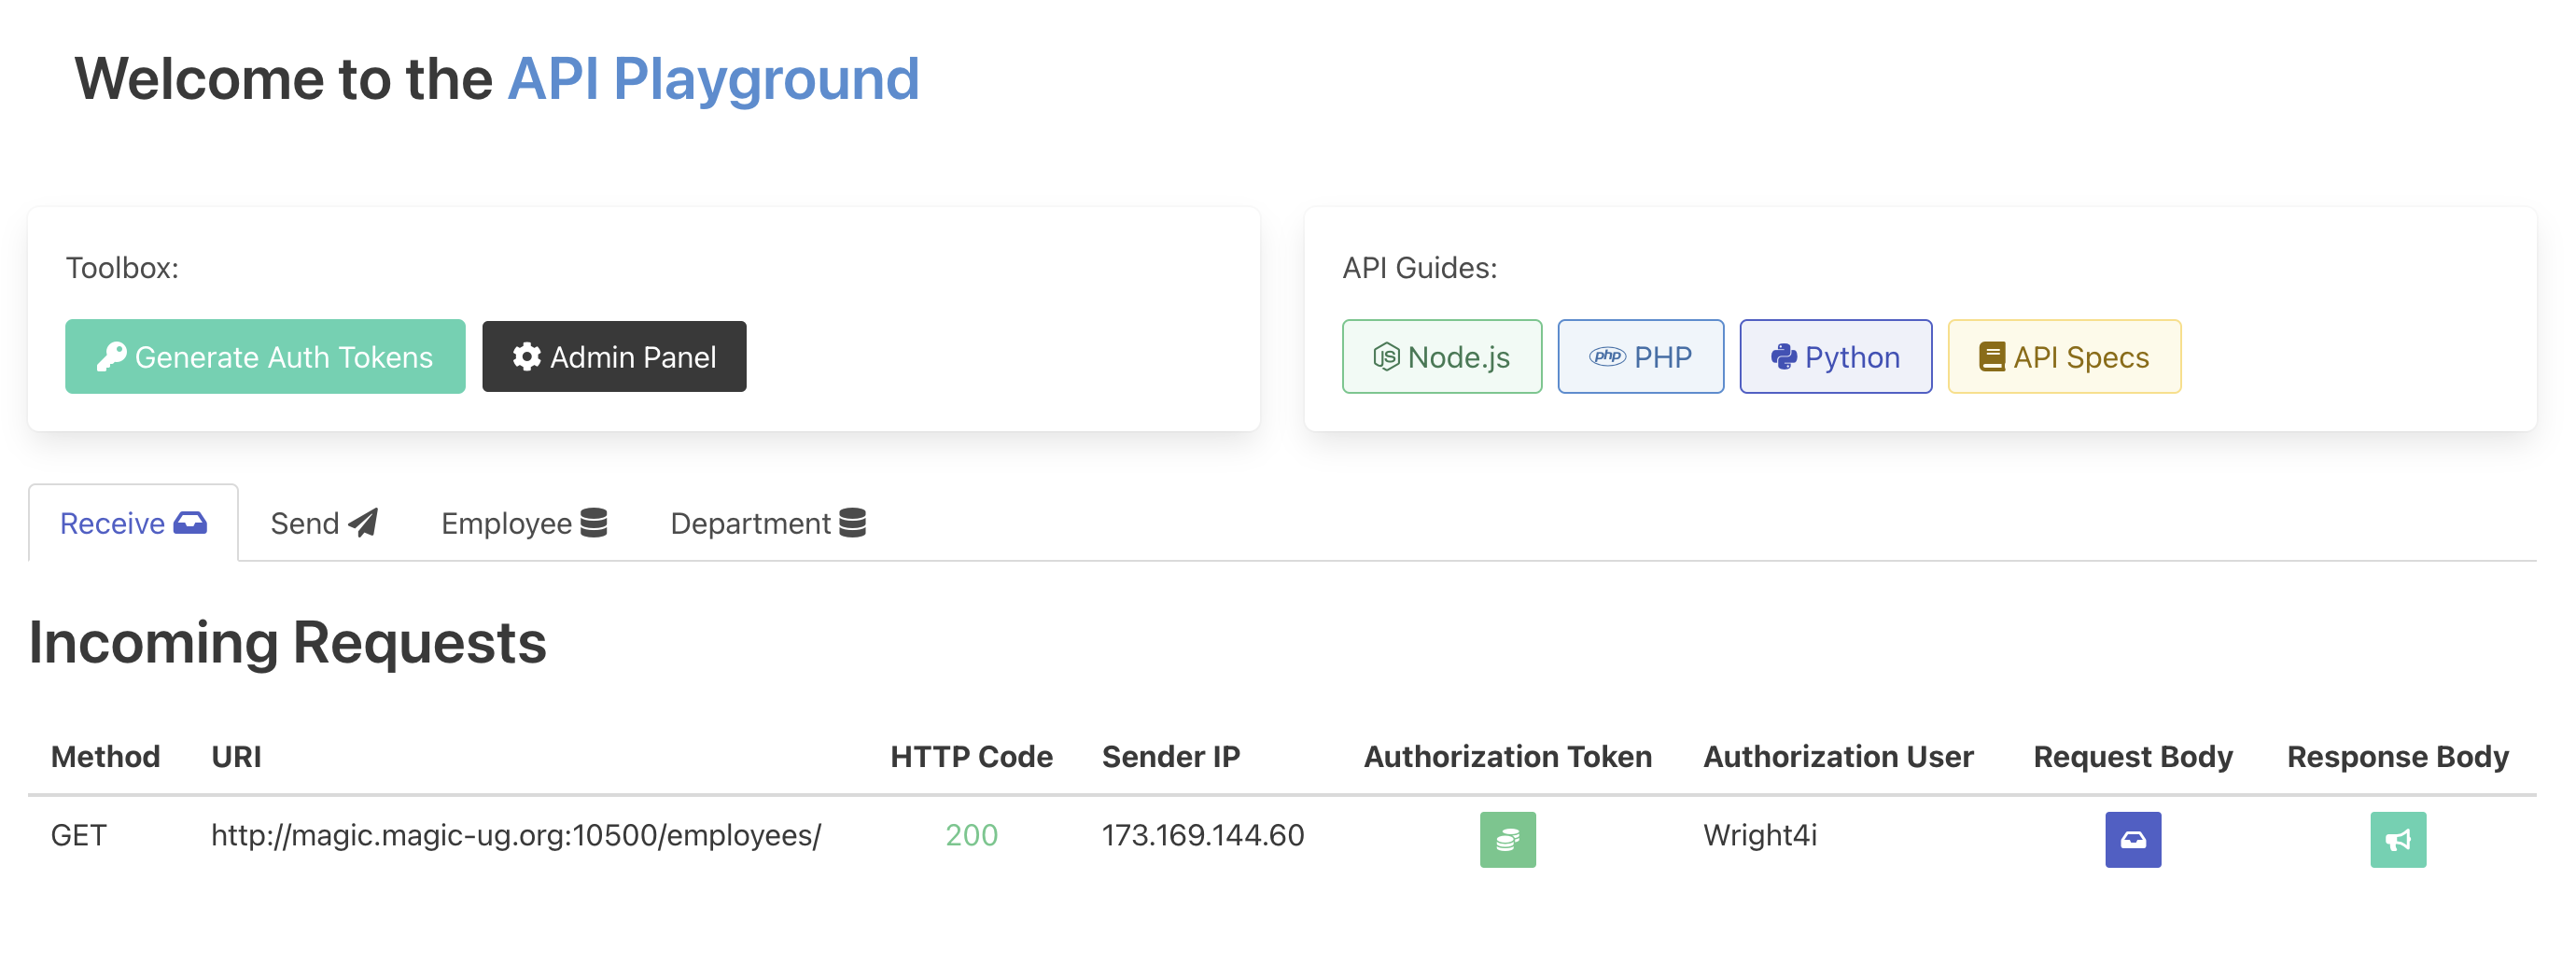
Using the Send Tab you can send a GET POST or PUT to your API.
Give it a shot!